Setting up
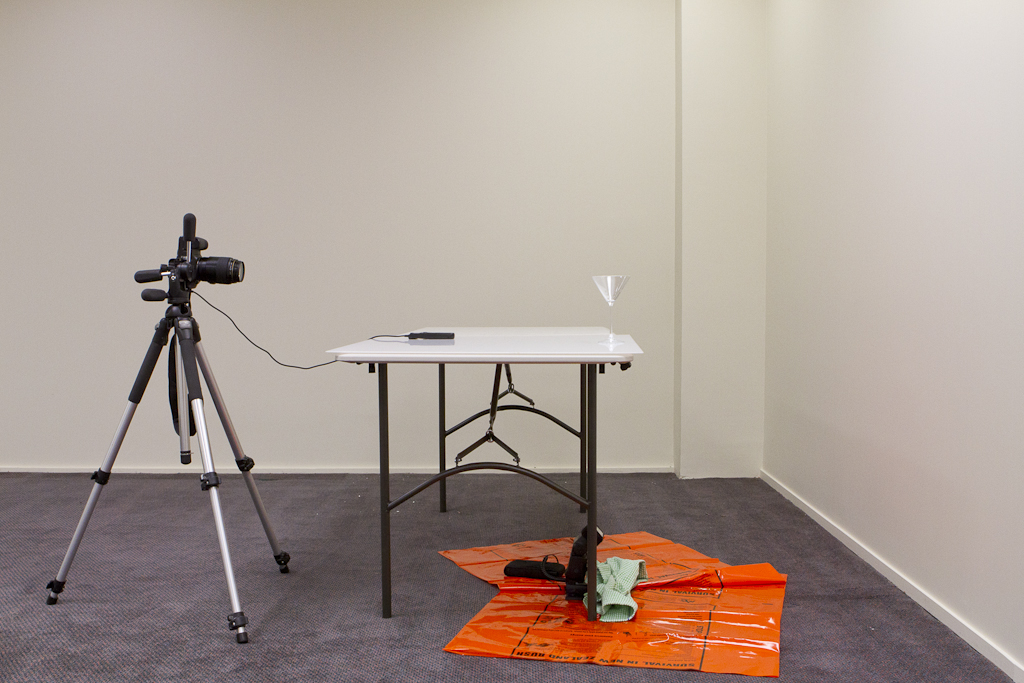
- Set up your table near the white wall.
- Place the glass on your reflective surface, with the glass near the far edge of the table.
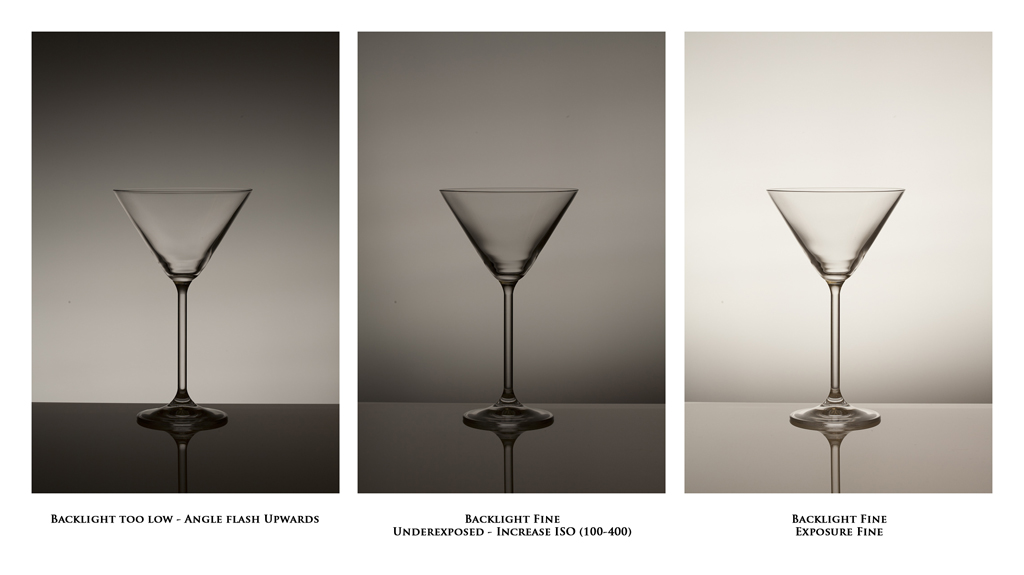
- Light reflecting off the wall needs to effectively backlight the glass.
- This also affects where the edge of the table cuts through the stem of the glass.
- Place your flash on the floor below the glass, aiming the flash head to illuminate the wall just above the glass.
- This will provide backlight for the glass as well as the water.
- Set up your camera on a tripod in front of the glass.
- Compose the shot with enough negative space above and below the glass to allow for the stream of water and the reflection of the glass.
- Once your composition and focus is set, switch your lens to manual focus.
Camera settings. (These were the settings I used. Feel free to use them as a starting point)
- Manual exposure.
- Shutter speed: 1/160s.
- Aperture: +- f11 for adequate depth of field.
- ISO – 400.
- White Balance: Flash.
Flash Settings
- Triggered with pocketwizards.
- Flash Power: 1/64.
Take a test shot (without water)
- Check exposure and make adjustments as needed wrt ISO, flash power and aperture.
- Check focus on the glass.
- Check composition of the glass and vertical alignment of the stem of the glass.
- Check position of the light on the wall relevant to the glass.
- Once everything is set, you’re good to go.
Take the image
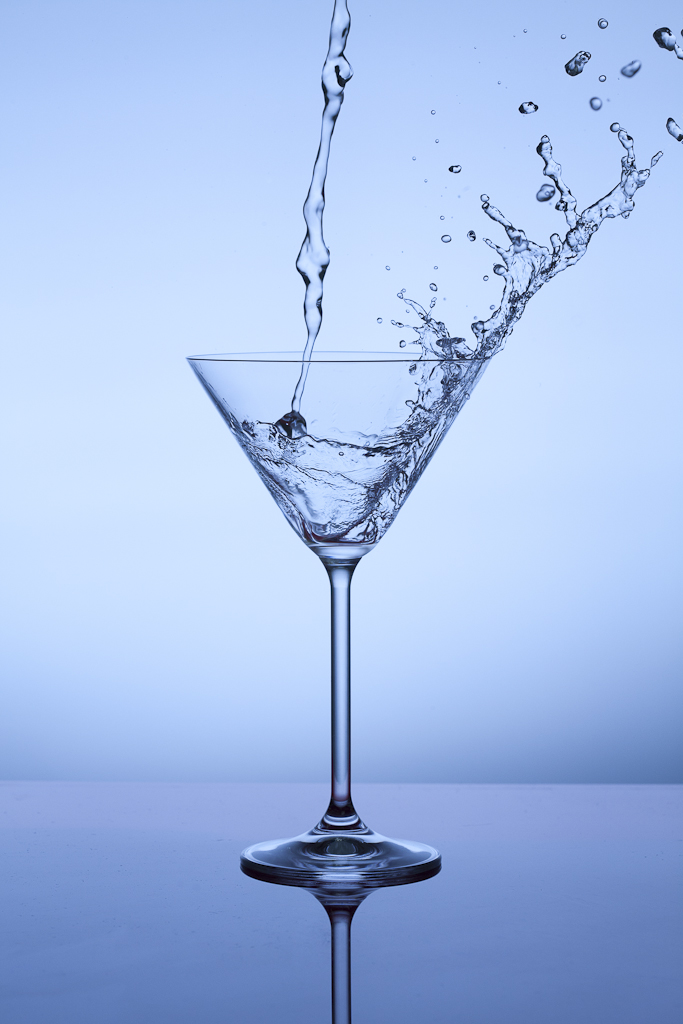
Using the cable release in one hand, and pouring with the jug in the other hand, take your final shot.
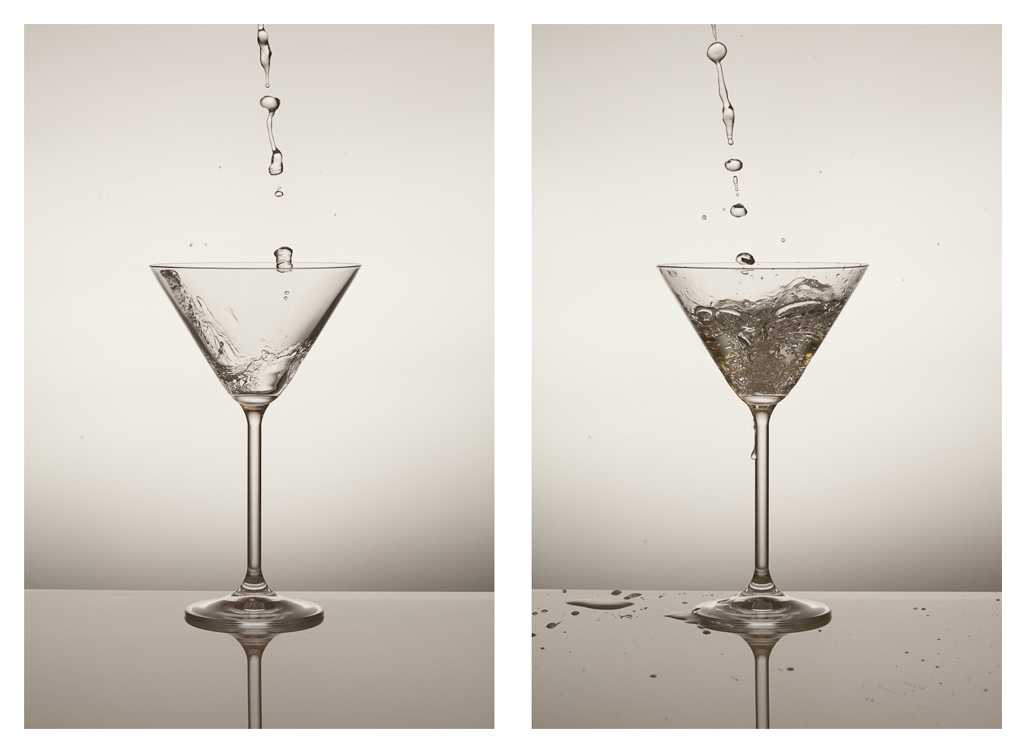
This image can be tricky, simply because you have one chance to capture the pour as the water hits the bottom of the glass, and timing is a big factor.
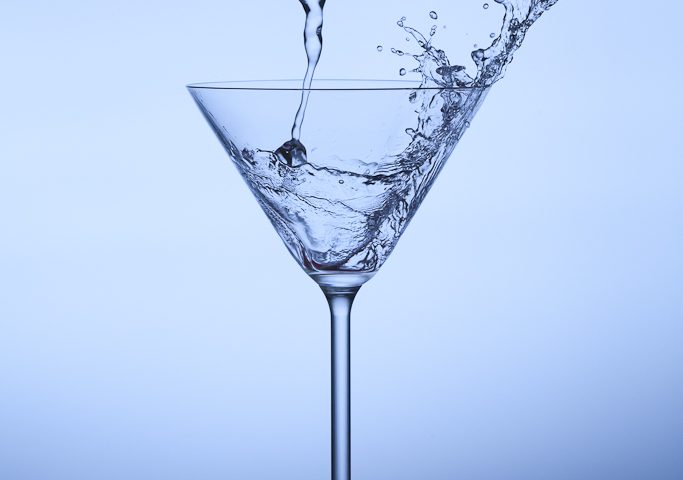
Images taken after the glass starts filling (see image below) do not look as dramatic, and taking further shots means drying the set, setting up a new glass and achieving focus and composition all over again.
The images below were taken on my first attempt, and none of them impressed me enough.
Creative options
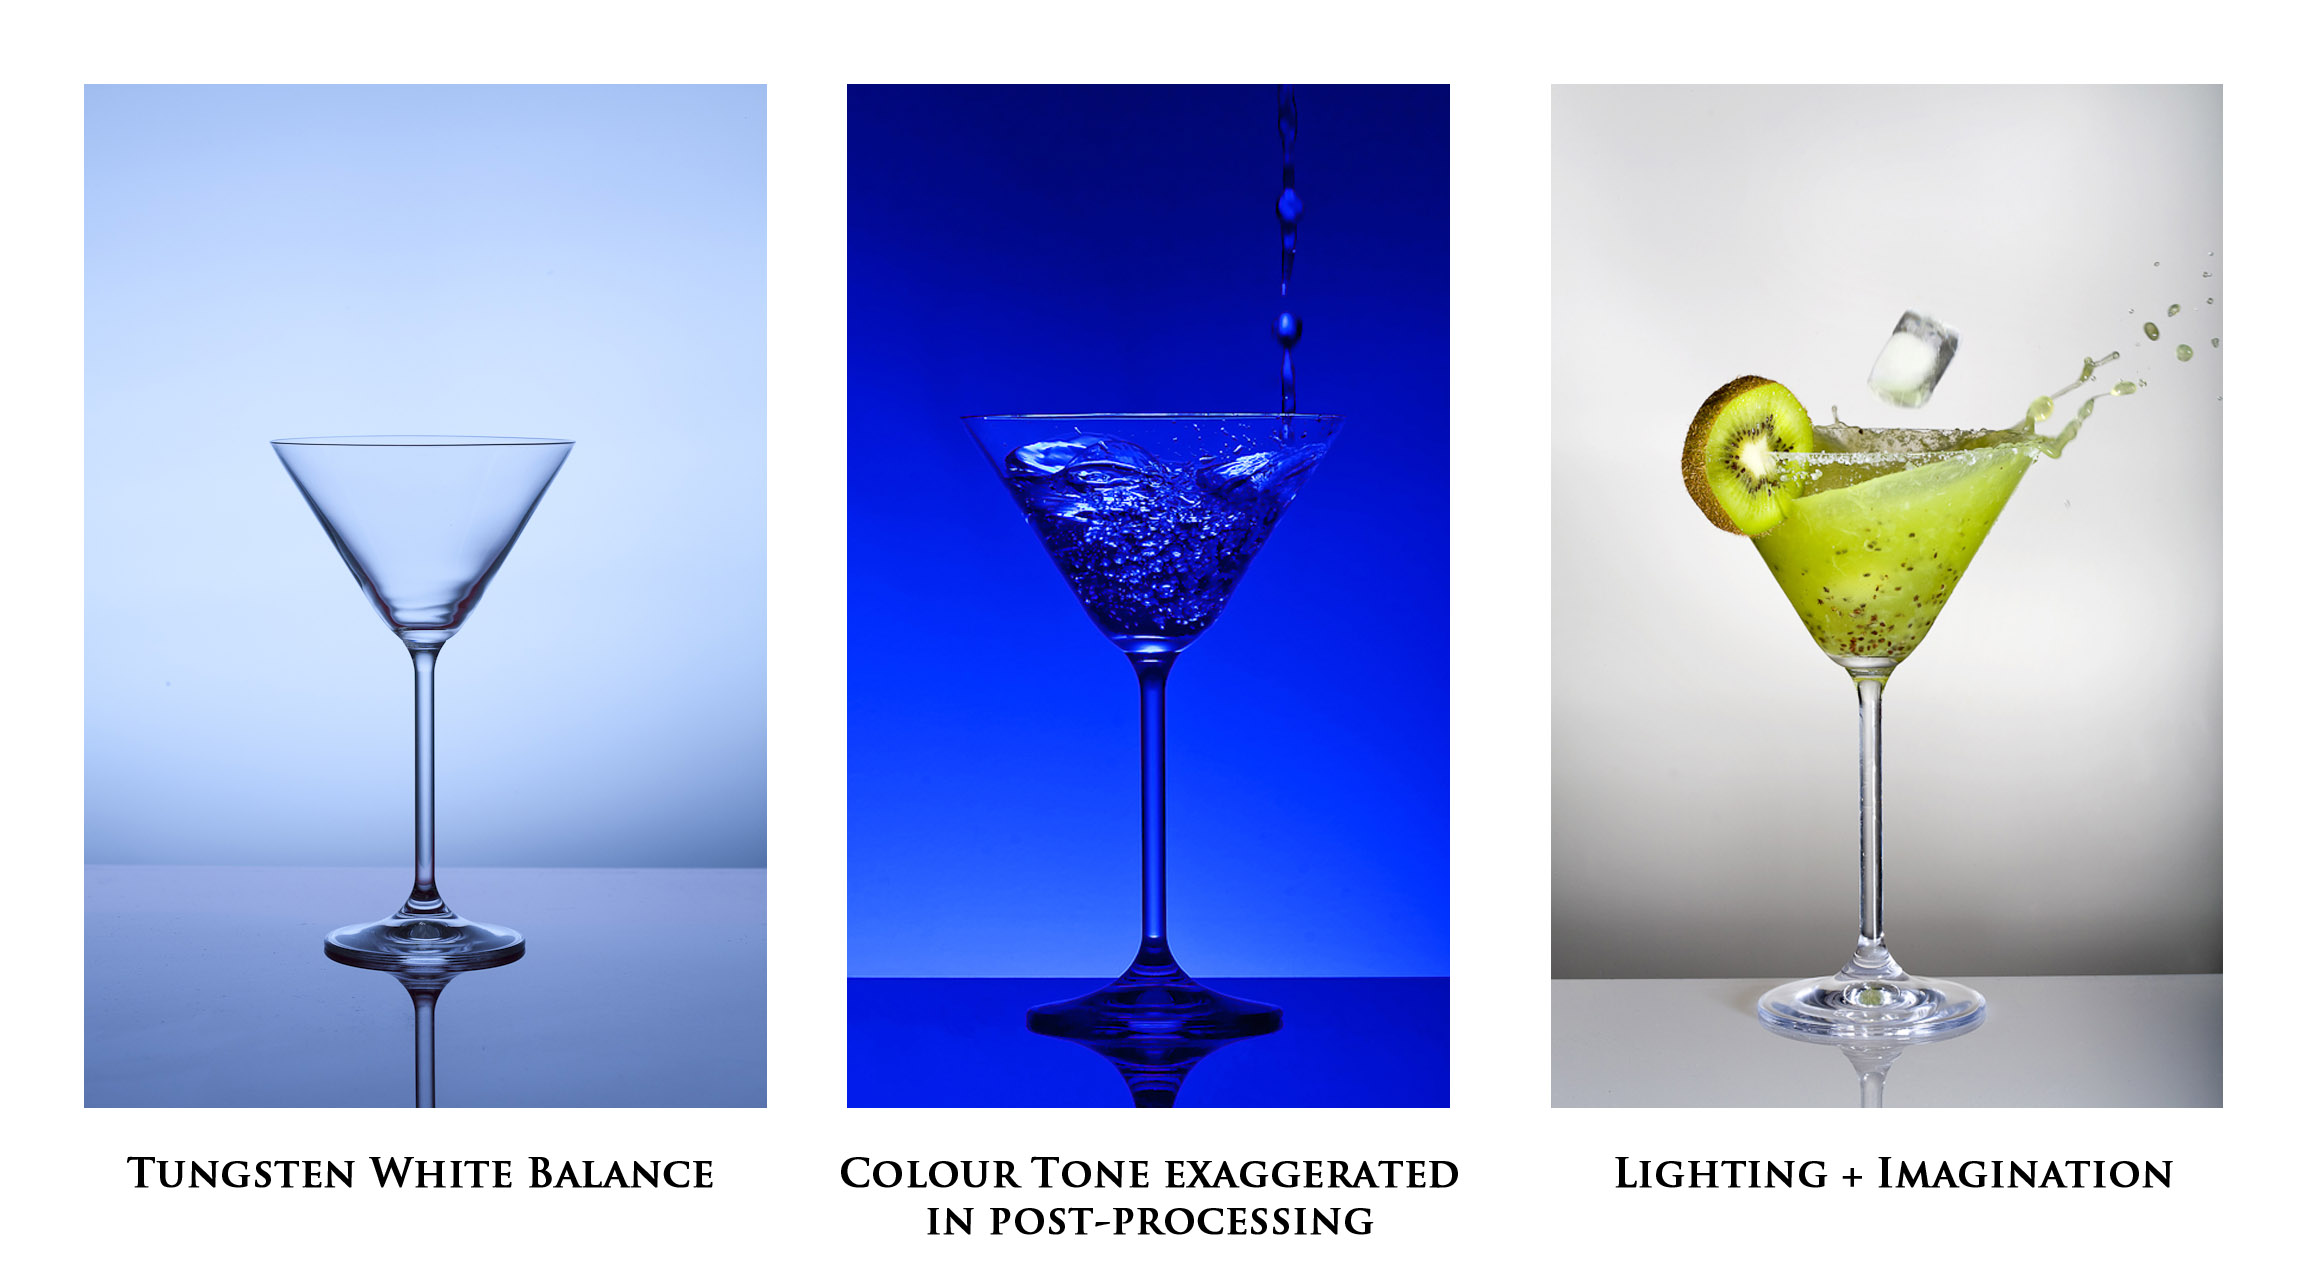
– Pour faster from higher for a dramatic splash
– Shoot in tungsten white balance for a blue tone.
– Add a colour tone in post processing.
– Add illumination from the front and a little inspiration to create something unique.
Learning Bites
The need for a low Flash Power and low ambient light.
A lower flash power is achieved by discharging the pulse of the light for a shorter amount of time.
If the ambient light is low, the camera’s sensor will only record what is illuminated in that fraction of time that light is discharged.
In other words, lower flash powers will work better at freezing motion in this setup.
Manual Flash power and Manual camera exposure
This achieves consistency in exposure from shot to shot, which is critical in this situation.
White wall
This provides a n efficient surface for light to bounce off of.
Light also picks up the colour of the surface it reflects off of, so using a white wall will keep the light that illuminates the glass and water fairly “clean”.
Take a dry shot before the final image
Firstly, this allows you to check your exposure.
Secondly, if your final image has a number of unsightly drops on the table, you can use your initial image to quickly clean this up using a mask in Photoshop.
Position of the glass
The position of the glass in relation to the edge of the table will have an effect on the amount of light that reflects through it.
Also, it will affect where the edge of the table is seen to pass through the stem of the glass.
Height of the pour
Pouring faster from higher above the glass will create a more dramatic splash, and subsequently, a more dramatic image.
Be careful, as this also means the water will be more likely to splash on the floor near your flash equipment.
I hope this tutorial has been of some use to you.
With a little bit of practice and a fair amount experimentation it can honestly yield some rather amazing results.
Feel free to submit any questions you may have regarding anything that remains unclear.
As always, happy flashing.

